了解状态
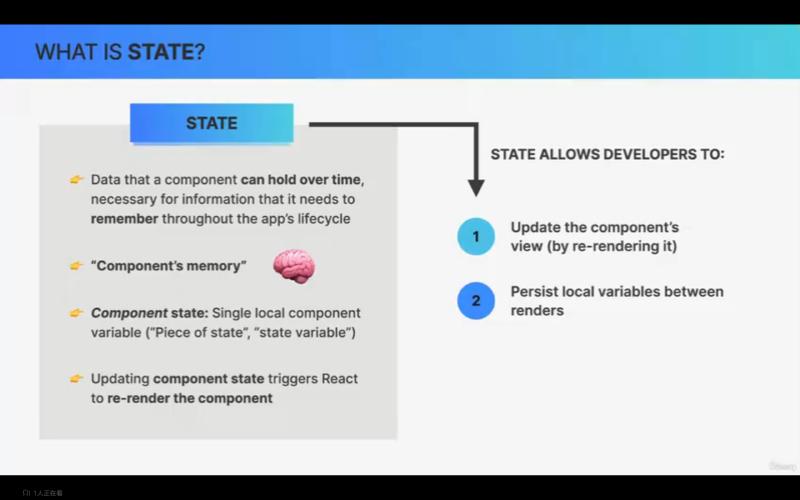
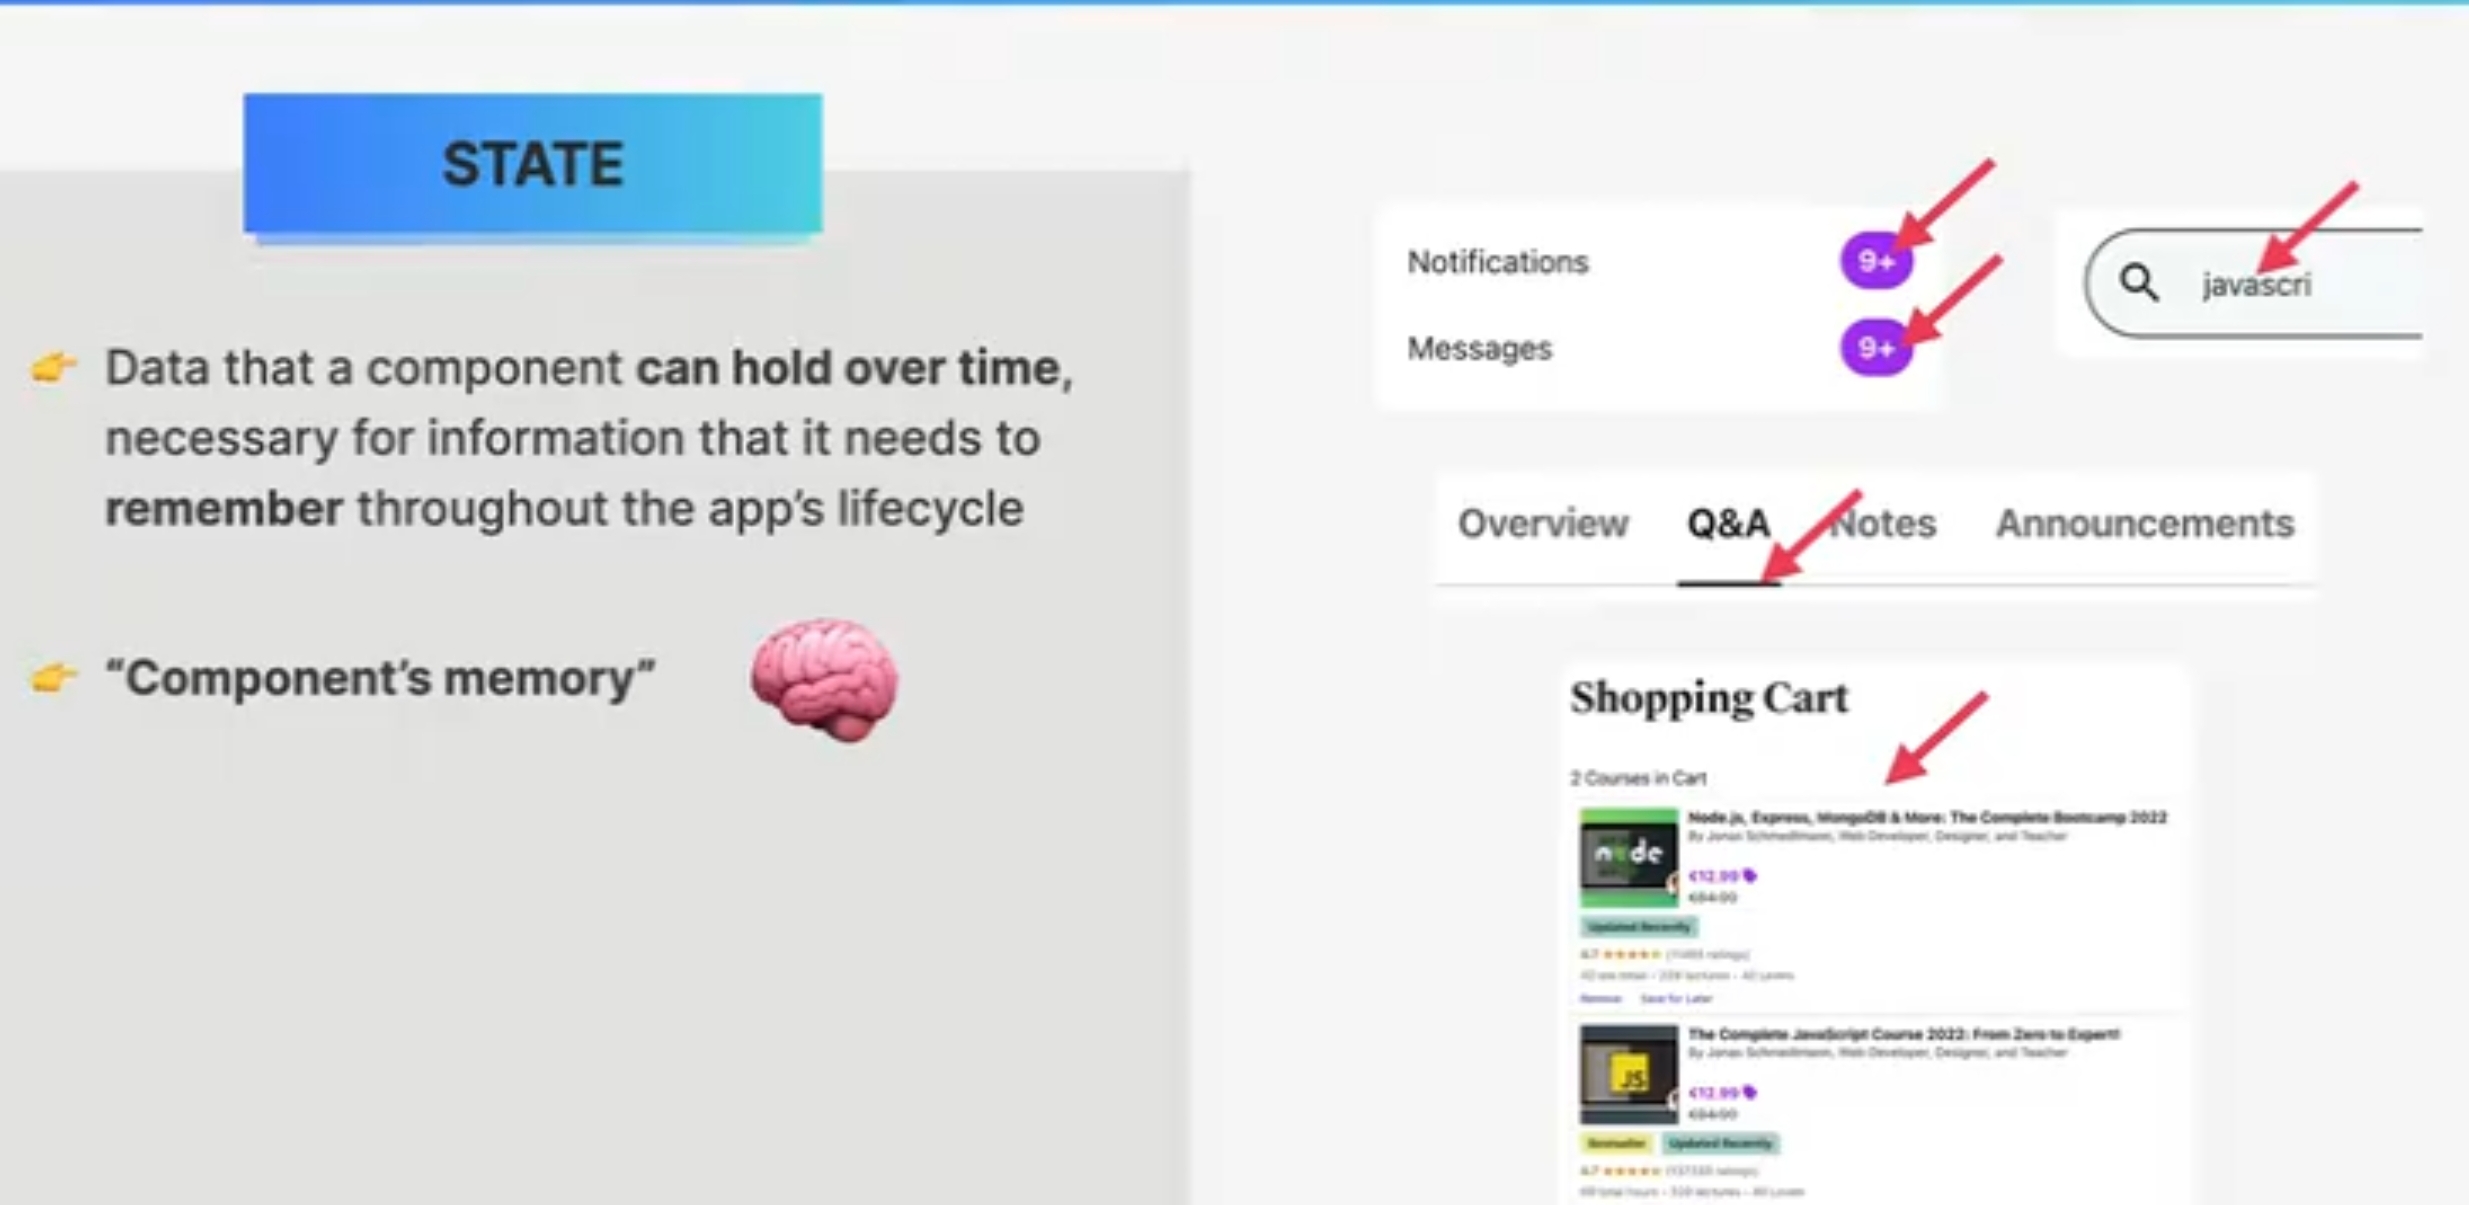
在React中,State是一种用来存储组件内部状态的变量。
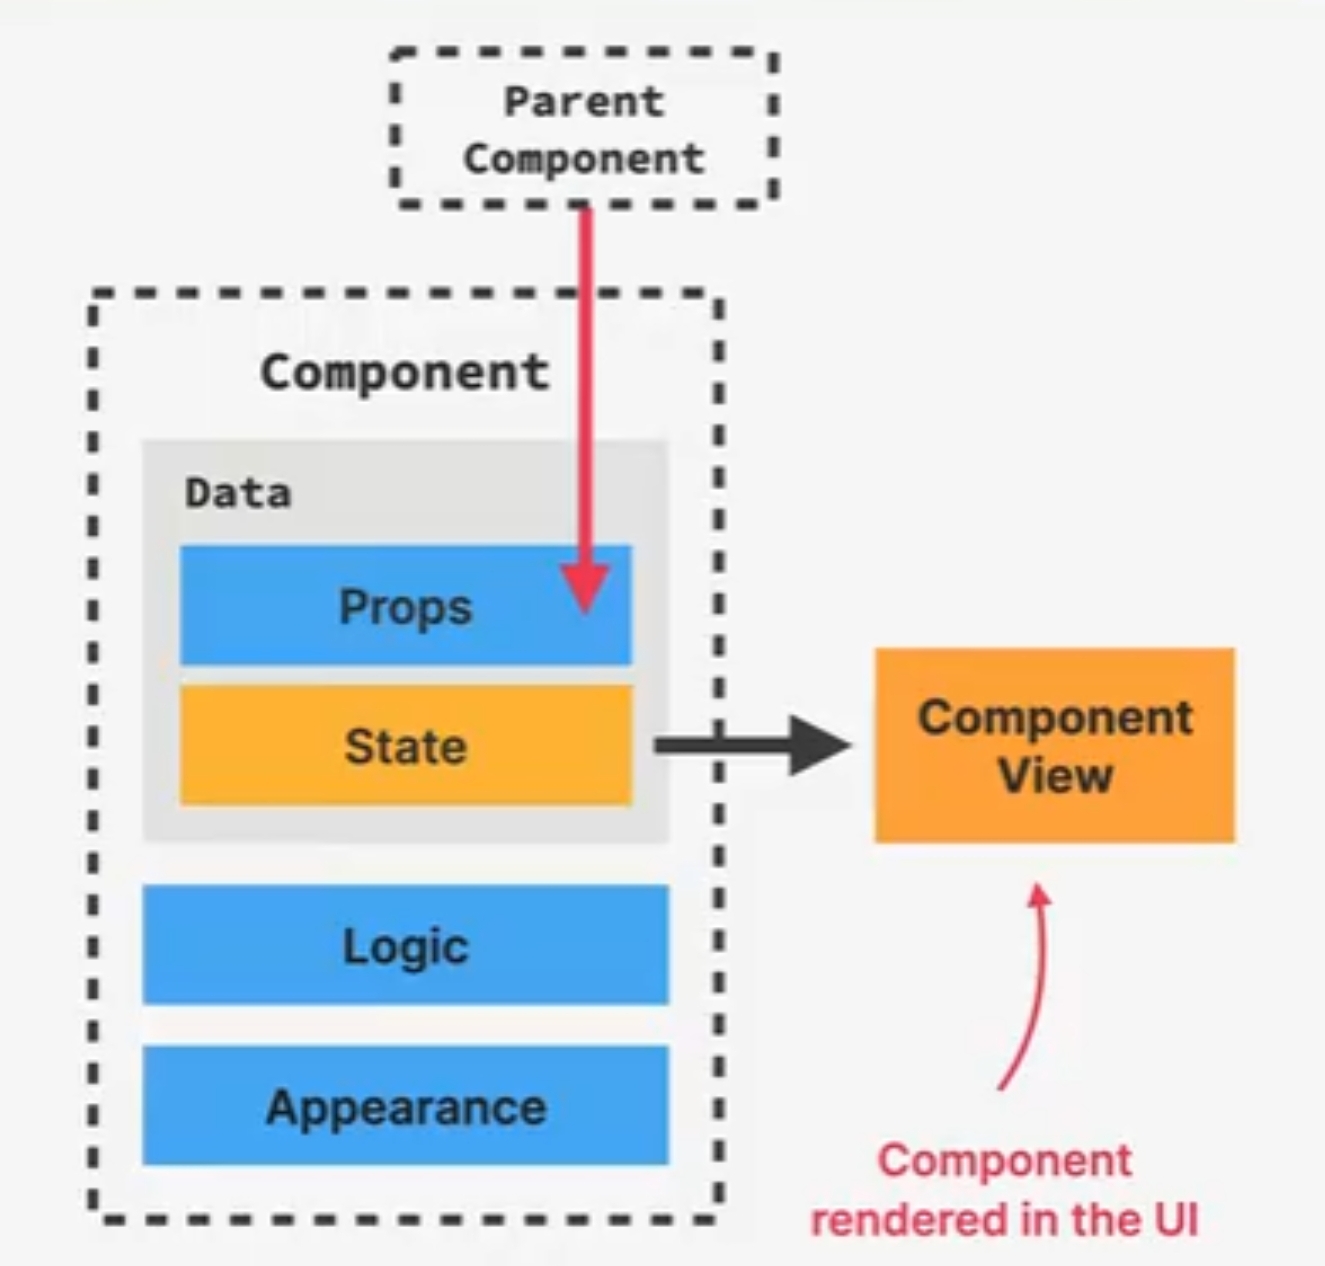
- 与上一章的
Props在组件间传递状态相对的,状态这一变量代表了组件内部的情况,可以被看做组件的“内存”。
- 作为组件内部情况的代表,每当状态的量发生改变时,React会重新渲染整个组件。
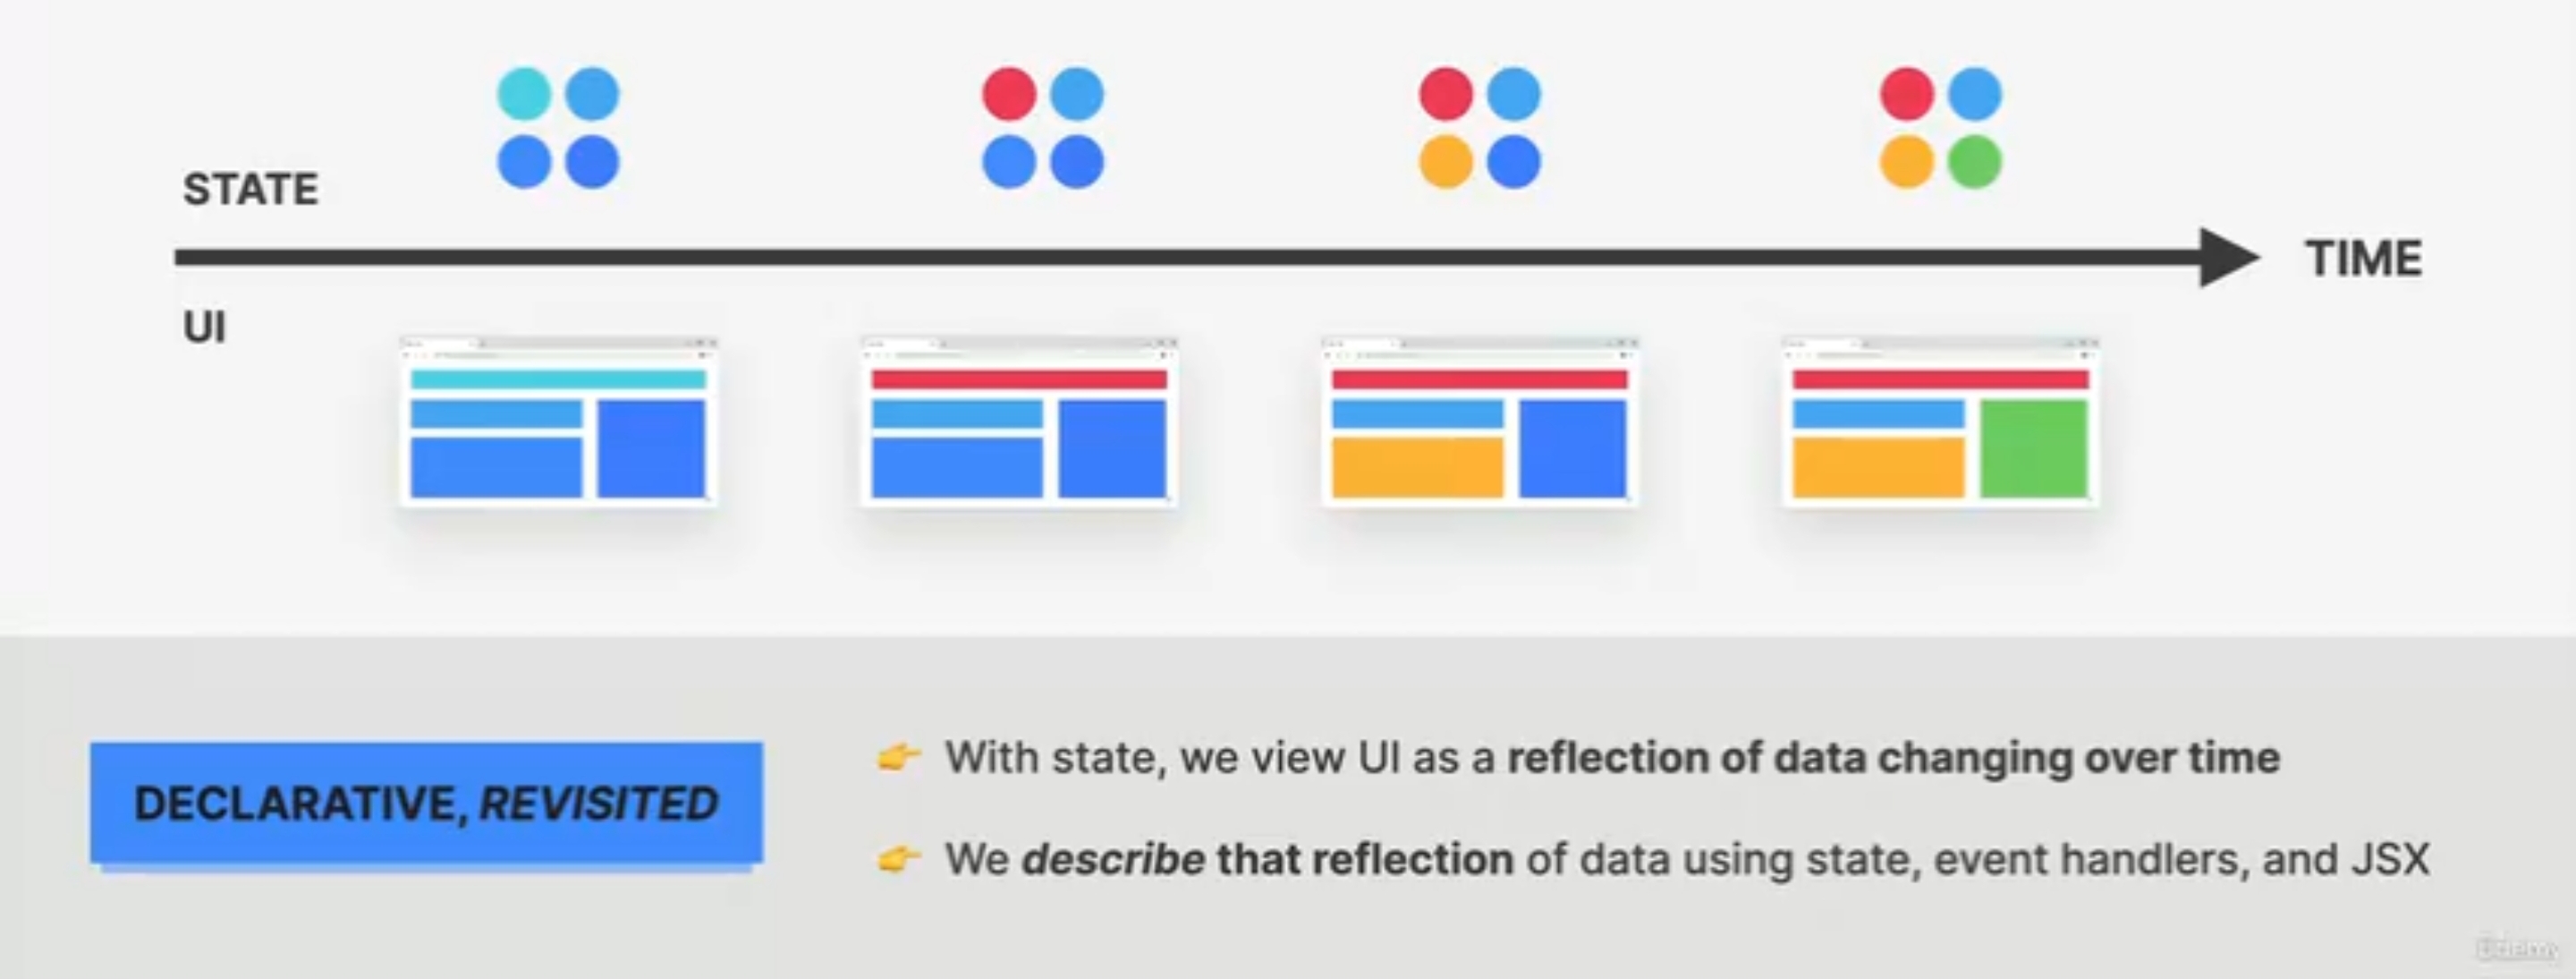
综上,状态作为一种持久化的局部变量,允许我们在更改组件内容的同时重新渲染整个组件。

使用状态,就意味着我们用声明式的代码构造了用户界面,并让其随着时间推移发生变化。
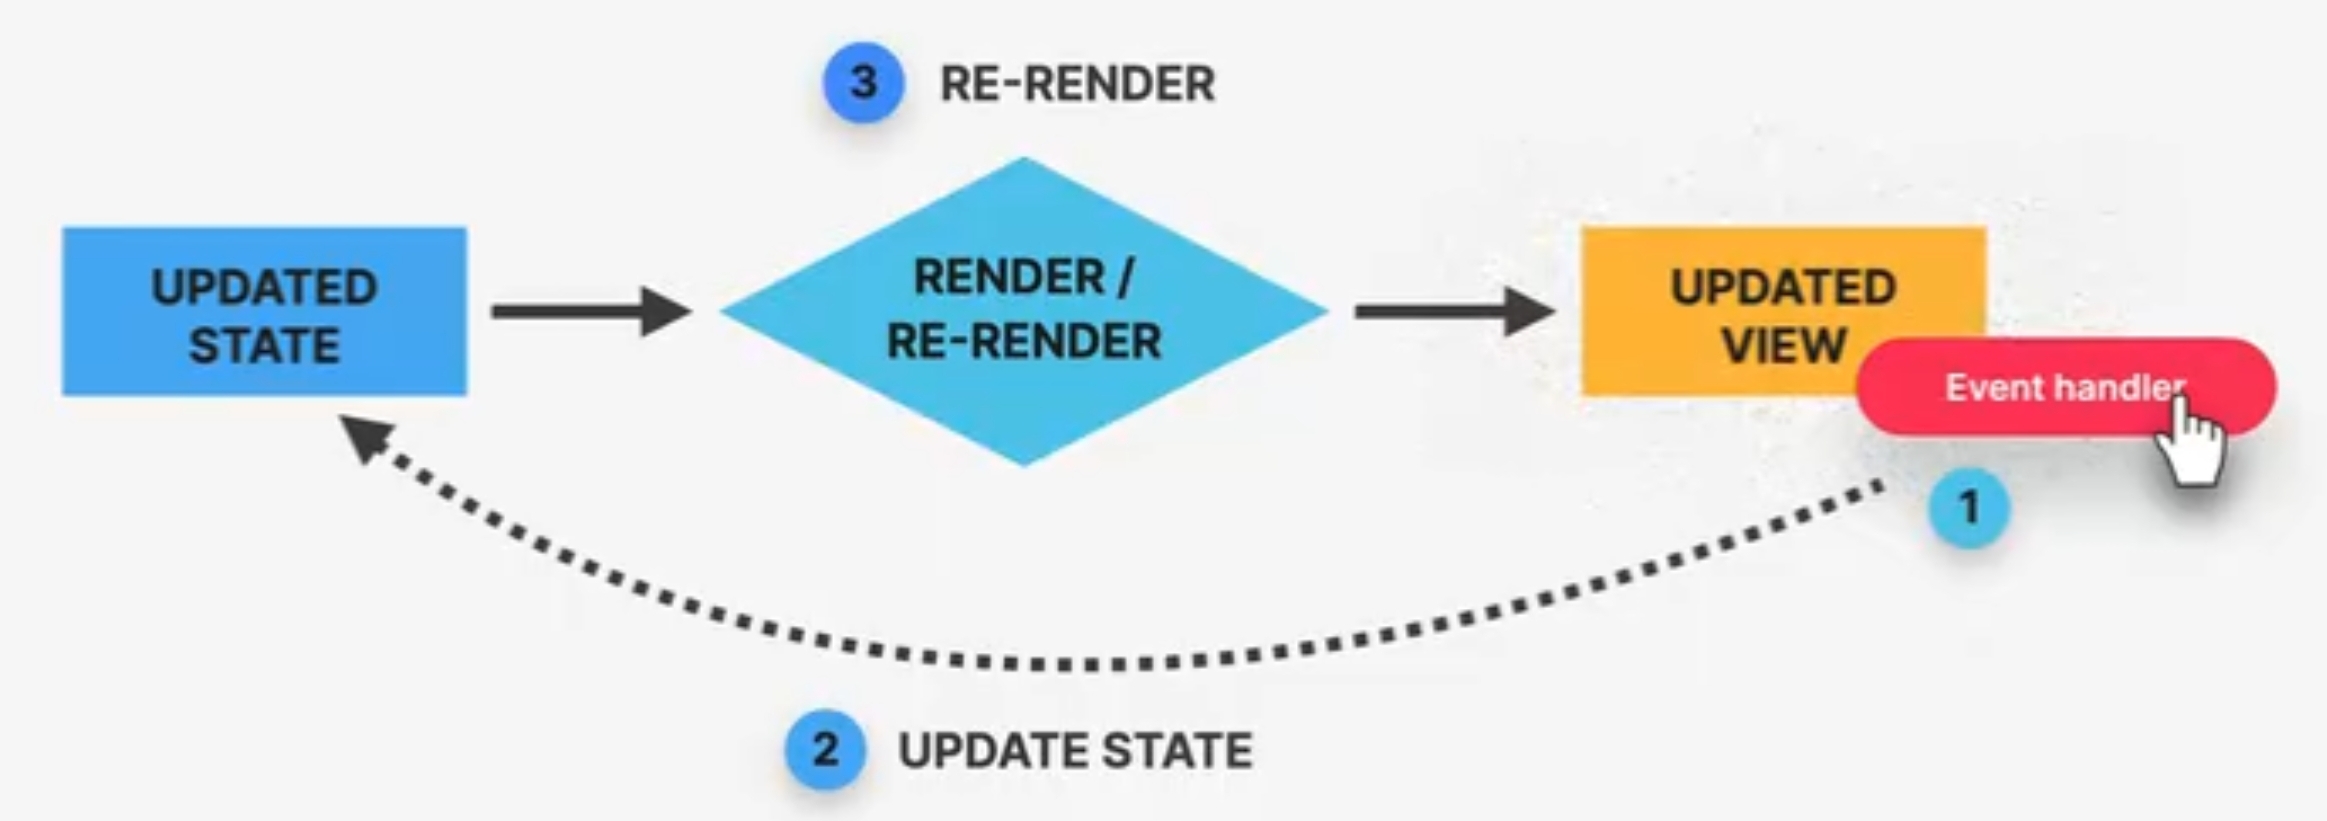
状态工作流程
- 我们定义组件的状态变量,并在处理用户交互逻辑的
handler函数中更新状态。
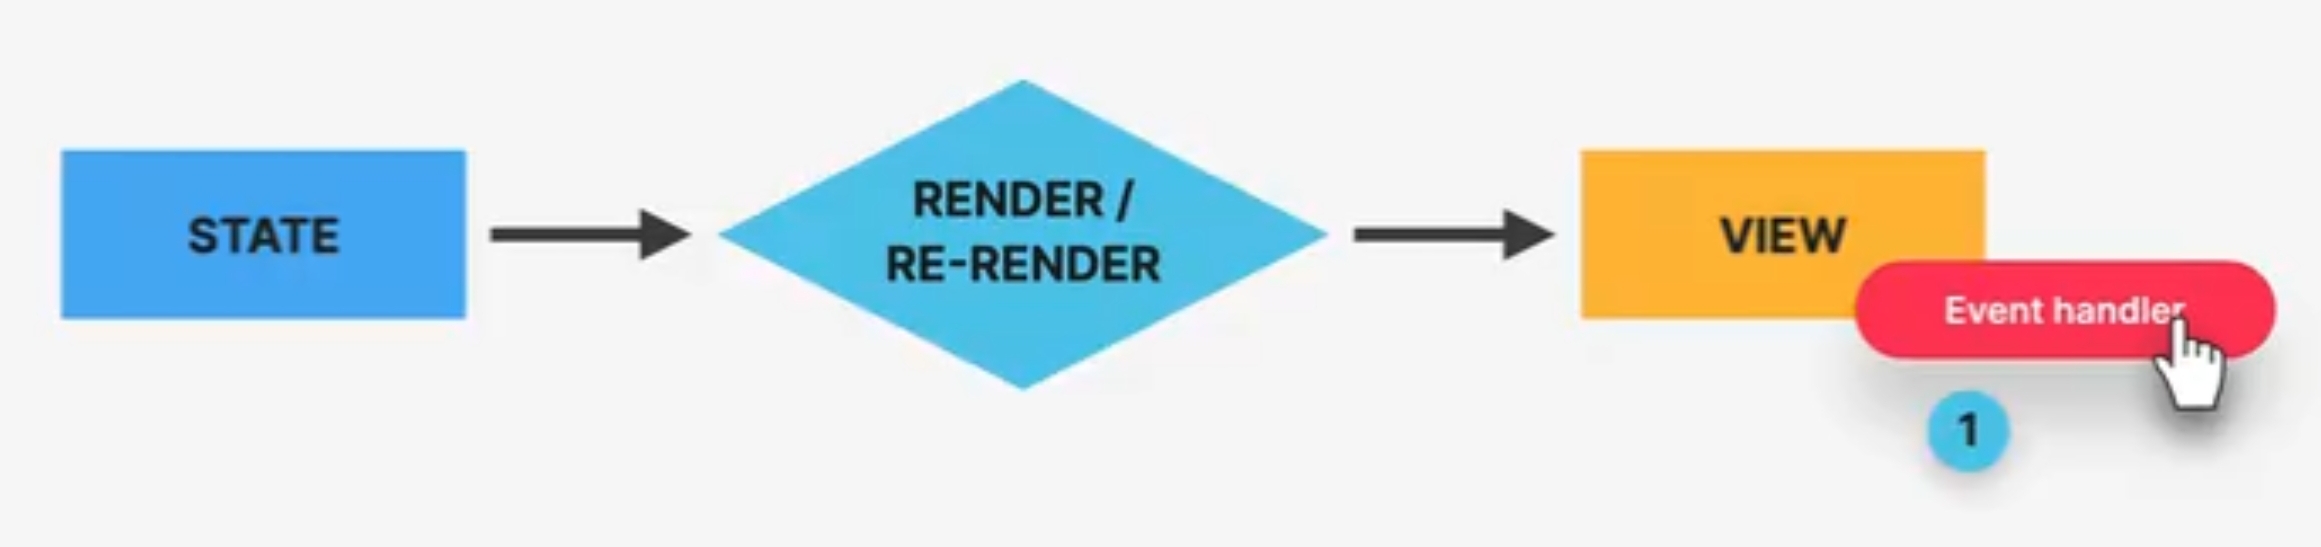
- 当用户与界面交互时,触发
handler并更新状态。React检测到状态更新,于是重新渲染组件。
状态与道具

使用状态
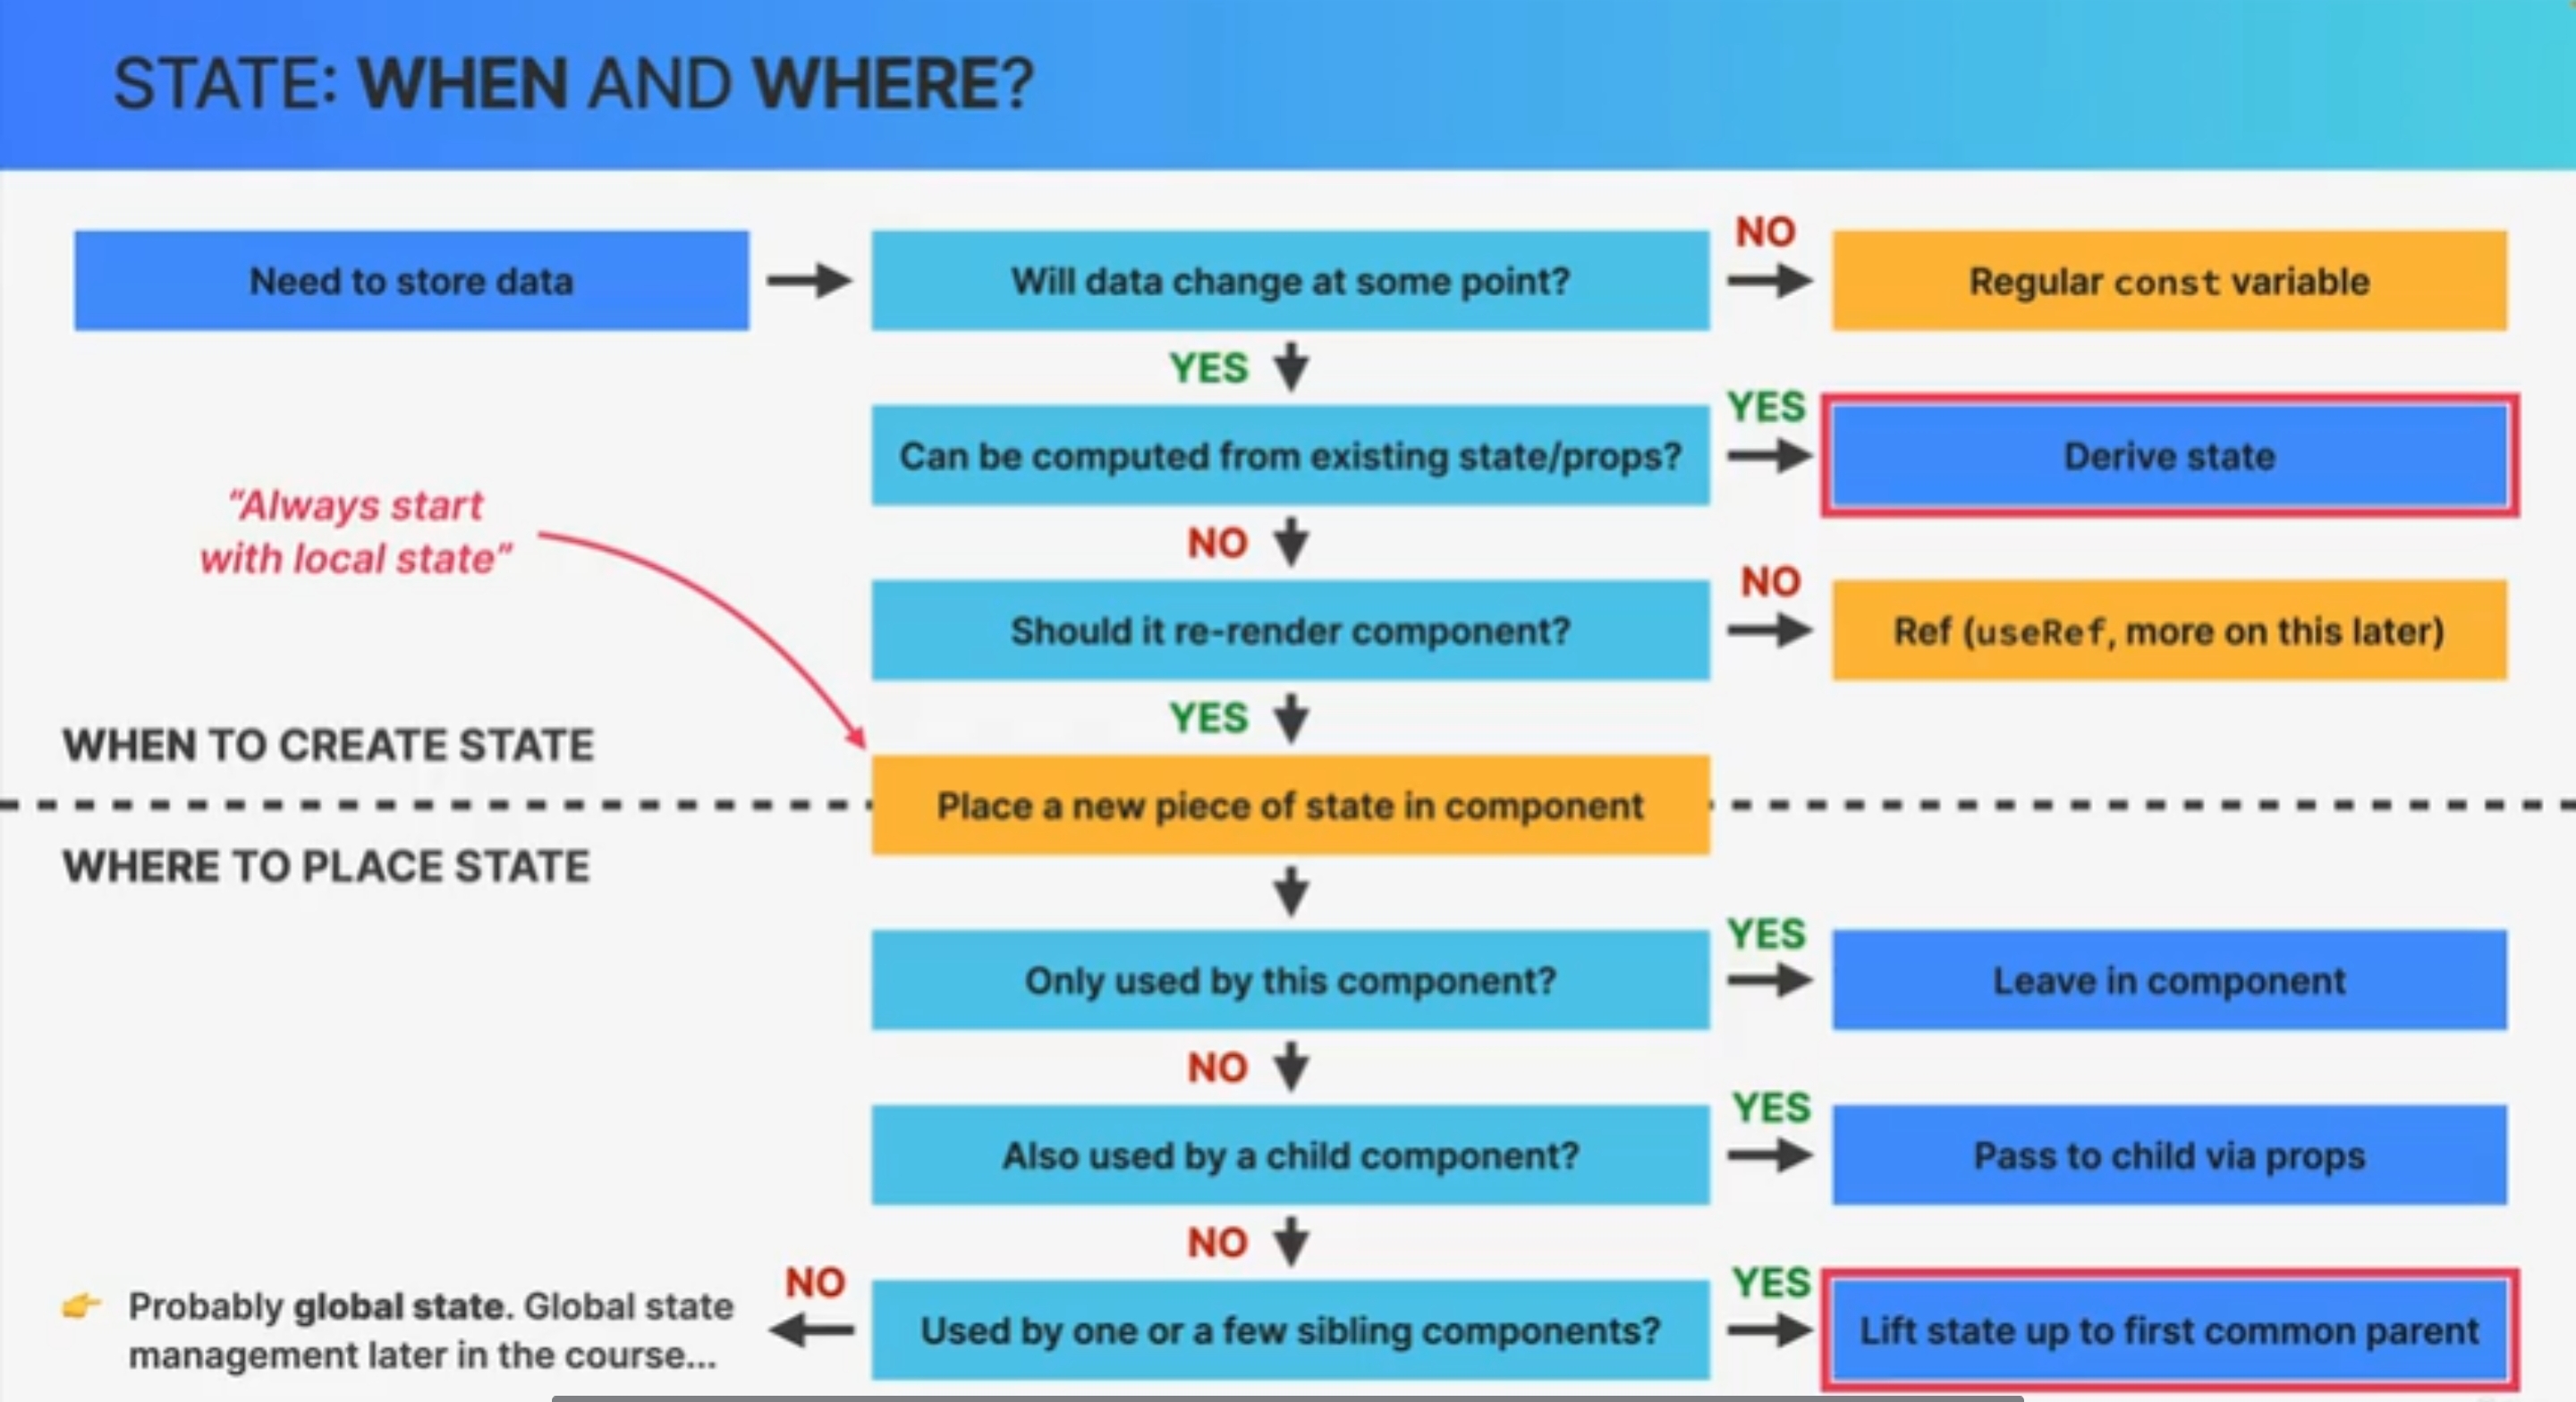
何时使用状态
状态基本语法
1
2
3
4
|
const [value, SetValue] = useState("init value");
console.log(value); // init value
SetValue("next value");
console.log(value) // next value
|
我们使用React的useState()函数生成一个状态的数组。数组第一位是状态变量本身,可以使用useState()函数的传入值来指定其初始值;数组第二位是更新状态变量的函数。实际应用中,要想重新渲染组件,就要使用数组中的更新函数来对状态进行更新。将状态定义成let或var都是无效的操作。
我们知道状态代表了组件内部的状态,因此在React中,状态只能在组件内开头定义。
实际使用中,我们还会使用更安全的方法来更新状态变量。
1
|
SetValue((value)=>value+1);
|
派生状态
实际应用过程中,有些变量可以由状态计算得到,并在重新渲染的过程中得到更新。我们可以创建这种类型的派生状态。
1
2
3
4
5
6
7
8
9
|
const [date,SetDate] = useState(new Date());

const month = date.getMonth()
const exdate = date.getDate()
const day = date.getDay()

return (
    <p>Today is {day} of {month} {exdate}.</p>
    )
|
实际编写过程中,为了减少状态管理的难度,我们应该尽量创建派生状态。
控制元素
我们可以使用状态量和设置状态函数来控制一些HTML元素的value和handler。
1
2
3
4
5
|
<input
        type={"text"}
        value={count}
        onChange={(e) => handleInputChange(e)}
      />
|
在这个HTML的input文本框元素中,我们将其文本值设置为count状态,并在其值改变时调用handleInputChange()函数,并在其中更新count状态。
1
2
3
4
|
function handleInputChange(e) {
    const t = e.target.value;
    setCount(t);
  }
|
状态提升
实际开发过程中,我们会在不同组件中创建大量的状态变量。然而由于React的单向通信原则,我们无法在各个组件之间使用道具来传递状态变量。因此,要让各个组件之间的状态互相同步,我们必须要将某个组件的状态提升到父节点上。
 1
 2
 3
 4
 5
 6
 7
 8
 9
10
11
12
13
14
15
16
17
18
|
function Count({ count, setCount }) {
  function handleInputChange(e) {
    const t = e.target.value;
    setCount(t);
  }

  return (
    <div style={{ textAlign: "center" }}>
      <button onClick={() => setCount((c) => Number(c) - 1)}>-</button>
      <input
        type={"text"}
        value={count}
        onChange={(e) => handleInputChange(e)}
      />
      <button onClick={() => setCount((c) => Number(c) + 1)}>+</button>
    </div>
  );
}
|
在这个Count组件中,我们使用到了count状态,但是却没有在Count组件内定义它,而是在它的父组件App内定义它。
 1
 2
 3
 4
 5
 6
 7
 8
 9
10
11
12
|
function App() {
  const [step, setStep] = useState(0);
  const [count, setCount] = useState(0);
  return (
    <>
      <Step step={step} setStep={setStep} />
      <Count count={count} setCount={setCount} />
      <DateP step={step} count={count} />
      <Reset setStep={setStep} setCount={setCount} step={step} count={count} />
    </>
  );
}
|
这样,所有App组件的子组件都可以使用count状态。当Count组件更新count状态时,所有App组件中的子组件也将正常重新渲染。
状态实战
我们制作一个日历程序,可以通过多种交互方式改变日期的描述。
首先分析程序中的状态。可以发现:
step和count会根据交互而改变,并在不同的组件中被更新;- 真实日期可以根据
step和count计算得出。
因此,我们在父组件App中定义step和count状态,并将其作为道具传递给子组件。
 1
 2
 3
 4
 5
 6
 7
 8
 9
10
11
12
|
function App() {
  const [step, setStep] = useState(0);
  const [count, setCount] = useState(0);
  return (
    <>
      <Step step={step} setStep={setStep} />
      <Count count={count} setCount={setCount} />
      <DateP step={step} count={count} />
      <Reset setStep={setStep} setCount={setCount} step={step} count={count} />
    </>
  );
}
|
- 在
DataP组件中,我们用step和count计算日期;
 1
 2
 3
 4
 5
 6
 7
 8
 9
10
11
12
13
14
15
|
function DateP({ step, count }) {
  let input = step * count;
  let date = new Date();
  let temp = date.getDate() + input;
  date.setDate(temp);
  date = date.toDateString();

  return (
    <p style={{ margin: 10, textAlign: "center" }}>
      {input !== 0 ? Math.abs(input) + " " : ""}
      {input !== 0 ? (input > 0 ? "Days from today " : "Days ago ") : "Today "}
      {input >= 0 ? "is" : "was"} {date}
    </p>
  );
}
|
在Step和Count组件中,我们控制HTML元素,将状态和交互绑定在一起。
 1
 2
 3
 4
 5
 6
 7
 8
 9
10
11
12
13
14
15
16
17
18
19
20
21
22
23
24
25
26
27
28
29
30
31
32
33
34
35
36
37
38
|
function Step({ step, setStep }) {
  function handleInputChange(e) {
    const n = e.target.value;
    setStep(n);
  }

  return (
    <div style={{ textAlign: "center" }}>
      <input
        type={"range"}
        min={"1"}
        max={"10"}
        value={step}
        onChange={(e) => handleInputChange(e)}
      />
      <span style={{ margin: 10 }}>Step: {step}</span>
    </div>
  );
}

function Count({ count, setCount }) {
  function handleInputChange(e) {
    const t = e.target.value;
    setCount(t);
  }

  return (
    <div style={{ textAlign: "center" }}>
      <button onClick={() => setCount((c) => Number(c) - 1)}>-</button>
      <input
        type={"text"}
        value={count}
        onChange={(e) => handleInputChange(e)}
      />
      <button onClick={() => setCount((c) => Number(c) + 1)}>+</button>
    </div>
  );
}
|
最后,我们添加一个Reset按钮组件,按下时就清空count和step状态。
 1
 2
 3
 4
 5
 6
 7
 8
 9
10
11
12
13
14
|
function Reset({ setStep, setCount, step, count }) {
  function handleReset() {
    setStep(0);
    setCount(0);
  }

  return (
    (step !== 0 || count !== 0) && (
      <div style={{ display: "flex", justifyContent: "center" }}>
        <button onClick={handleReset}>Reset</button>
      </div>
    )
  );
}
|